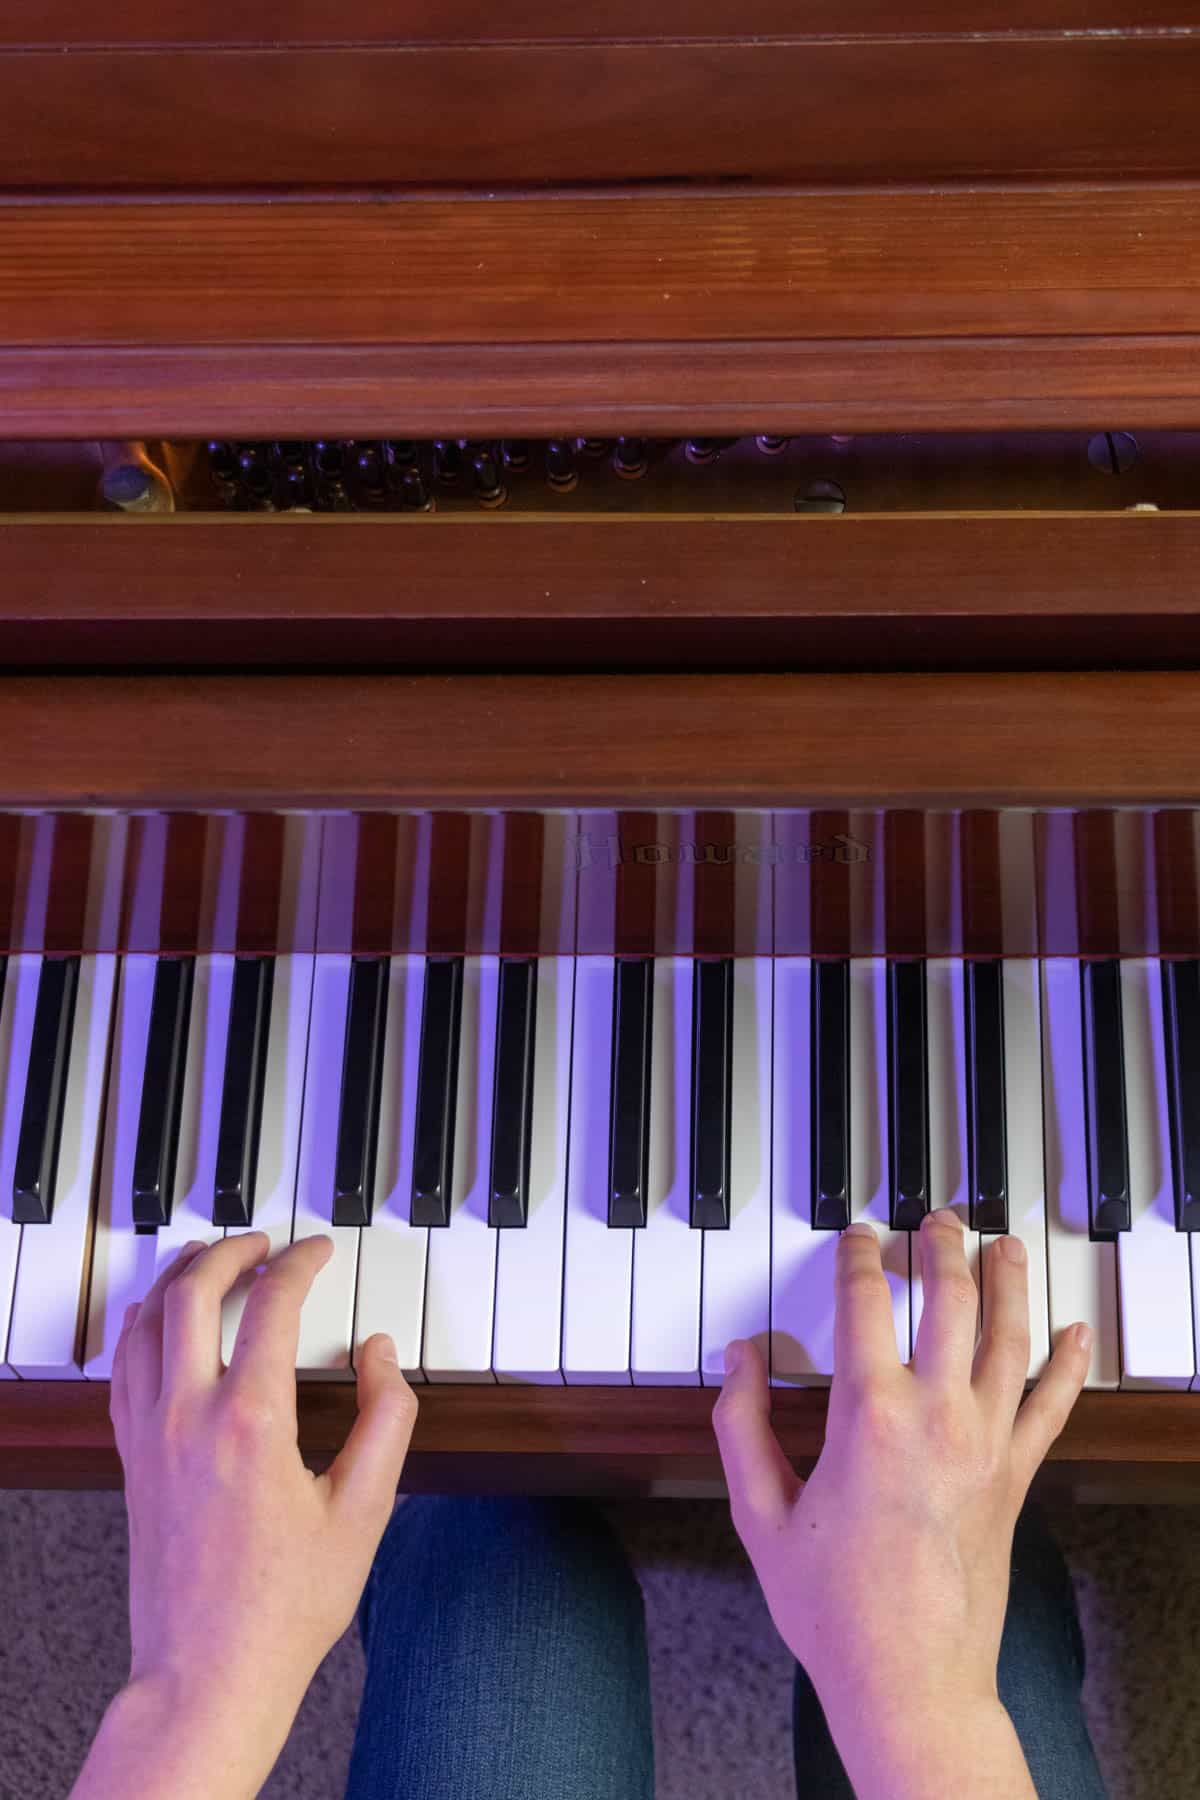
You can’t play the piano with only one hand, so how can you get your hands to cooperate with each other? No matter how challenging it might seem to play piano with both hands, I’m going to show you how you can do it!
Make playing the piano hands together even easier by starting with the body posture and hand position.
Jump to:
Challenge #1
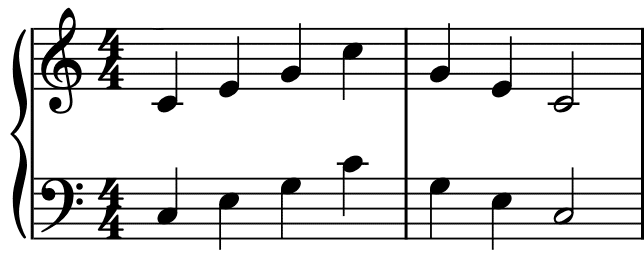
If you’re brand new to piano, one of the best exercises to start with is the five-finger scale, or pentascale. In this simple exercise, we run through the notes from C to G, and then back down to C.
Try this by placing your left pinky on low C, and your right thumb on middle C. Play hands together on C, D, E, F, and G, then come back down to C. Great job!
Challenge #2
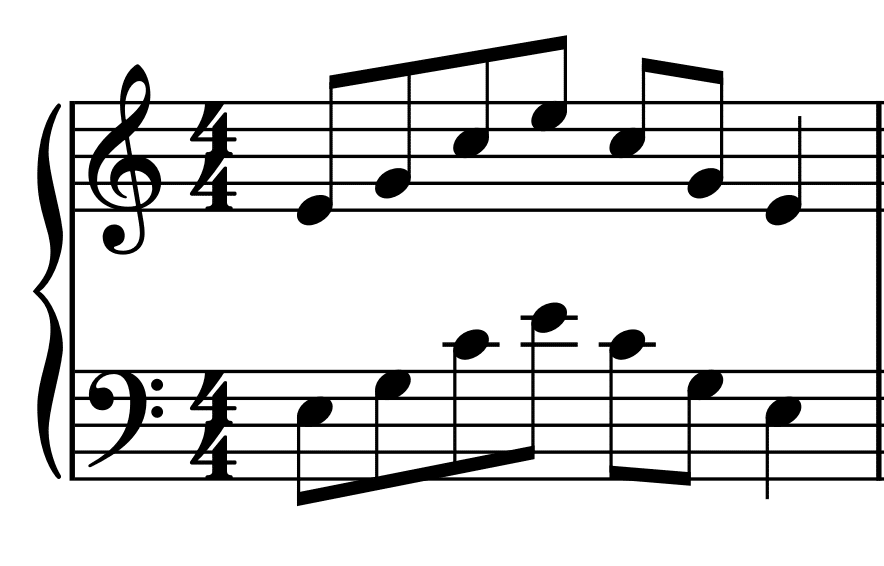
Let’s add a simple tweak to make this pentascale a little bit more challenging. We just learned to how to play it in parallel motion, which means that both hands are moving in the same direction, but let’s learn how to play it in contrary motion. This means that our hands will be moving away from each other, and then coming back together.

Place both of your thumbs on middle C, then slowly work your way out to your pinky fingers (G in the right hand and A in the left hand), then come back together so both thumbs are on C. Fantastic work!
Challenge #3
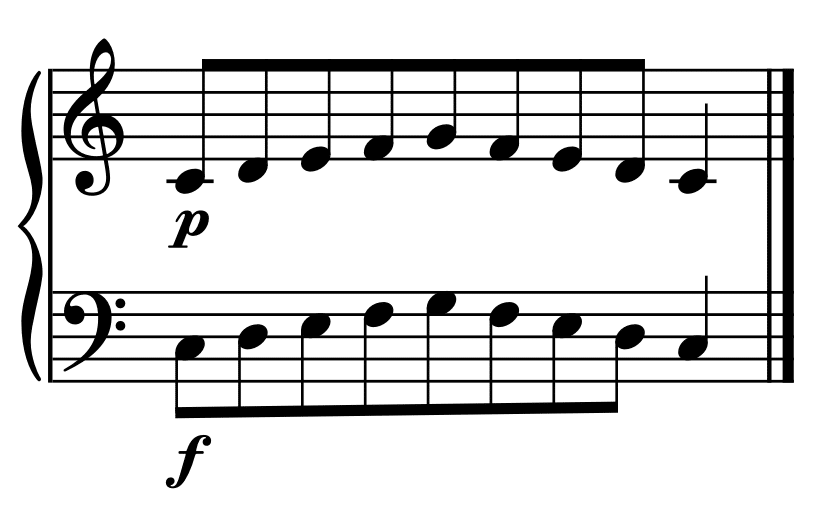
Now, let’s experiment with how loudly and how softly we can play these pentascales. Playing softly, or piano, requires more strength and control, while playing loudly, or forte, is often a little easier.
On sheet music, piano is symbolized with a p under the music, while forte is indicated with an f under the notes.
Challenge your hands together skills by playing the right hand softly, and the left hand loudly.
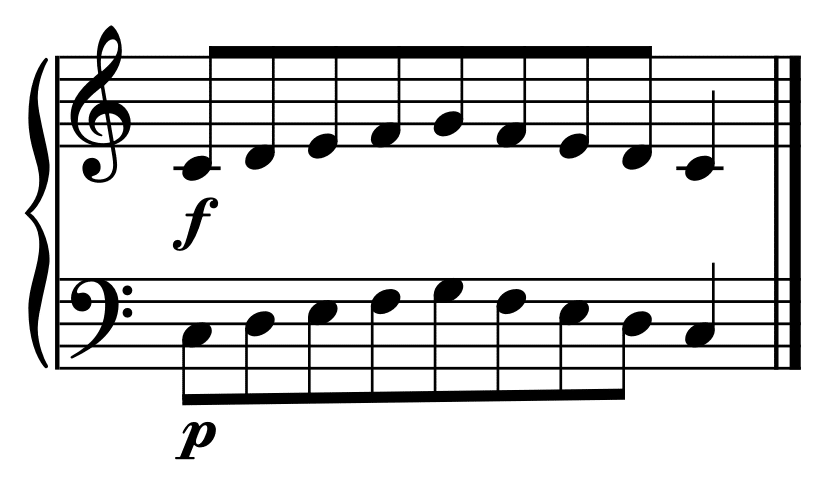
Now, try the reverse so the right hand is playing loudly, and the left hand is playing softly.
Challenge #4
Let’s challenge your finger control even more by changing how you press down the keys. We already know how to play legato, or smoothly, so let’s try playing staccato, or detached.
Use the same parallel motion pentascale we did in Challenge #1. When you press down a key, touch it quickly as though it's hot; don't let your finger linger on the key. This is playing staccato. Make sure to try this hands separately first, then together.
On the sheet music below, you'll notice a dot below each note in the treble clef, and below or above each note in the bass clef. These dots indicate that these notes are to be played staccato.
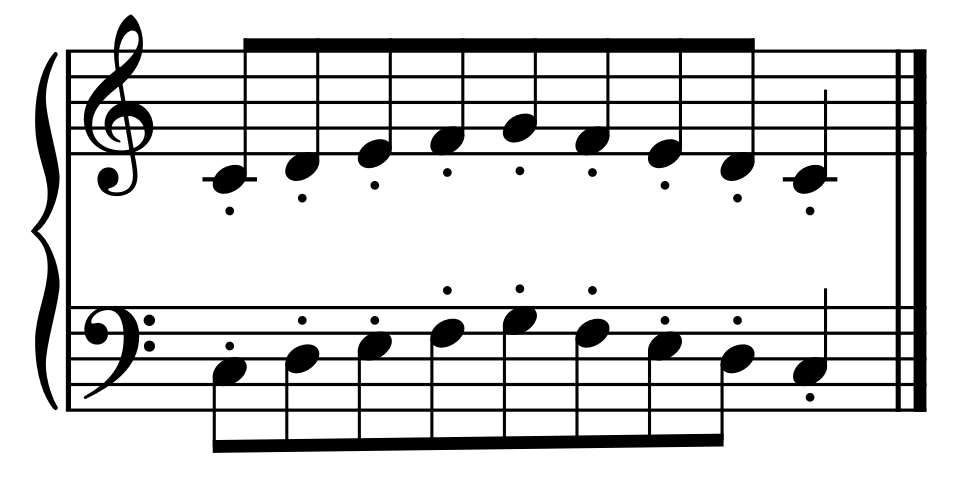
Change things up a little by playing the right hand legato and the left hand staccato. Remember, the dots in the LH passage indicate the staccato touch.
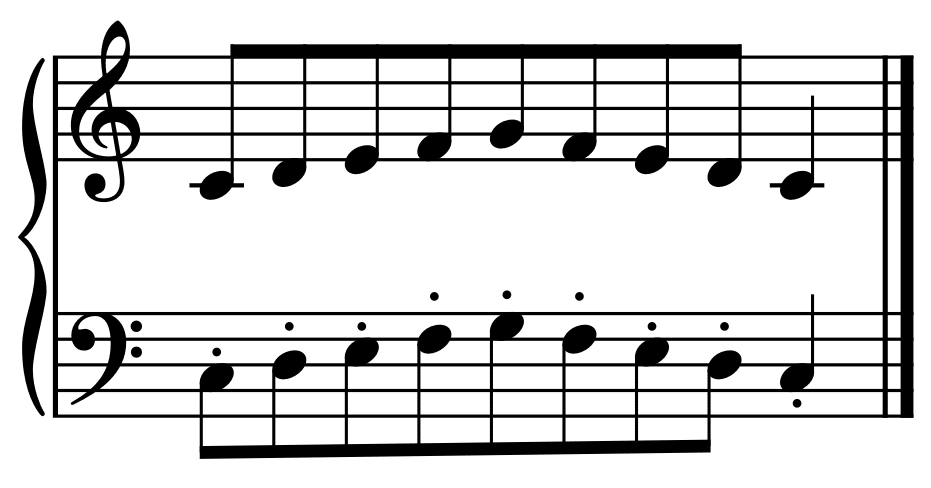
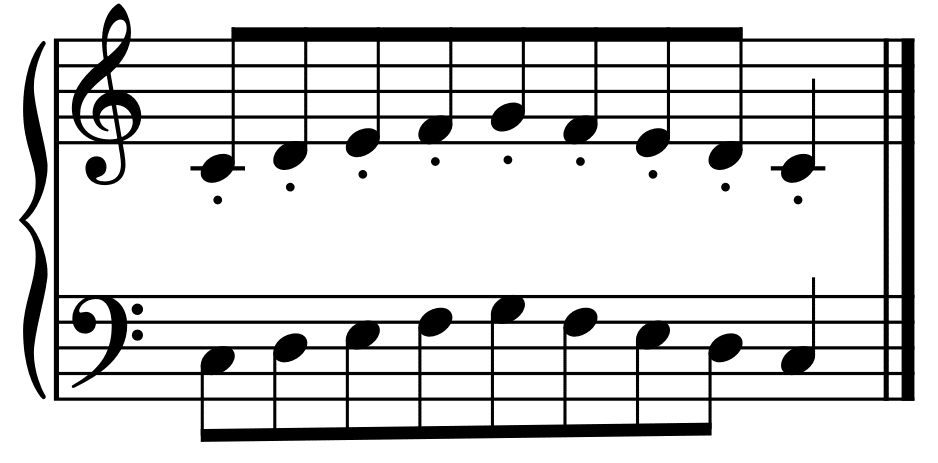
Of course, you’ll want to switch that up! This time, play the right hand staccato and the left hand legato.
Challenge #5
Let’s put away the pentascales for a few minutes and move on to chords. Today, we’re going to look at the C major triad.
The root position, C major triad consists of the notes C, E, and G in that order. However, we can make this more interesting by switching the order of the notes in the chord to create inversions.
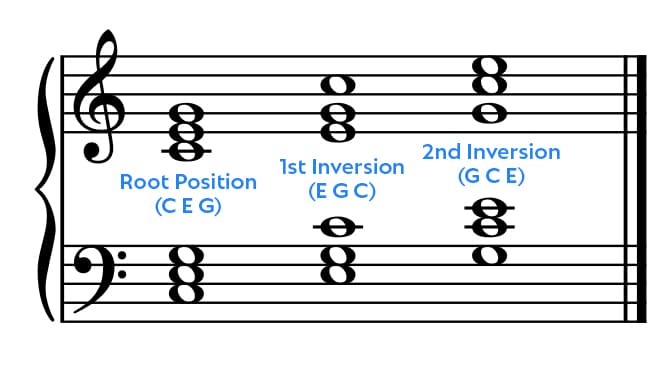
For example, if we take the bottom note, which is C, and put it on top of the chord, we have the first inversion: E, G, and C.
If we change the first inversion by putting the bottom note, E, on top of the chord, we have the second inversion: G, C, and E.
Now that you understand how the C major triad and its two inversions are constructed, practice playing them with both hands. It's a great exercise for your fingers and your music theory knowledge!
Challenge #6
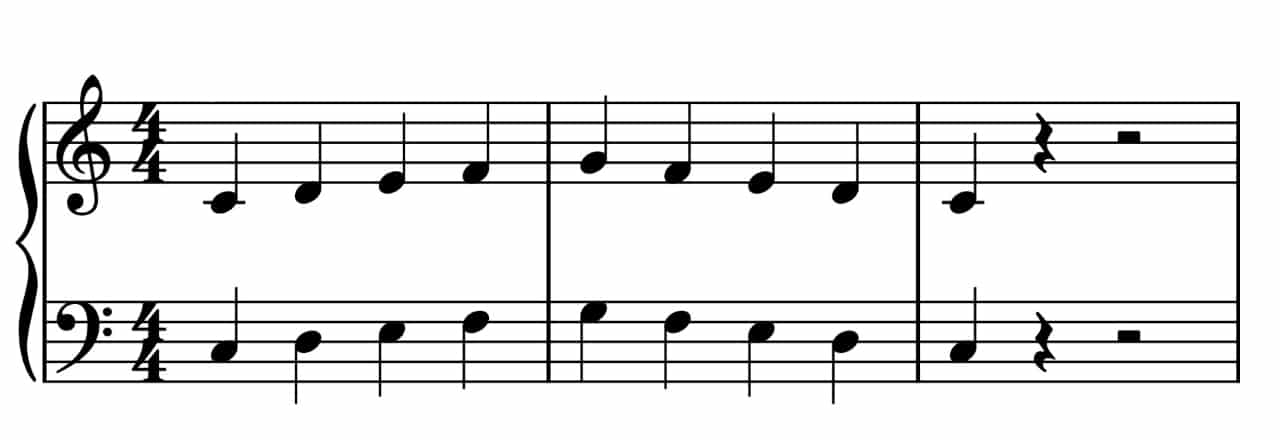
Let’s take that root position C major triad that we just learned and change it up a little. Instead of playing all three notes at the same time, let’s play one note at a time, and we'll play the starting note at the top, like this.
These beautiful broken chords are called arpeggios, and you’ll see them in a lot of piano music. You’ll definitely want to practice these arpeggios until you’ve mastered them!
If you really want to challenge yourself, play the two inversions of the C major triad as an arpeggio, too.
Here's the first inversion arpeggio:
And the second inversion arpeggio:
If you’ve made it this far, tell me what your biggest struggle with playing the piano hands together is in the comments. I’d love to hear your story!
Challenge #7
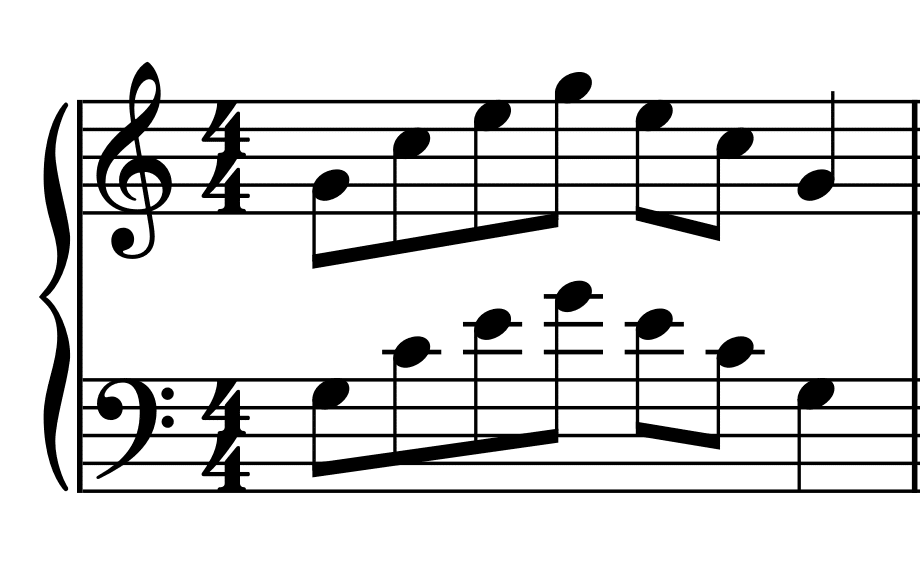
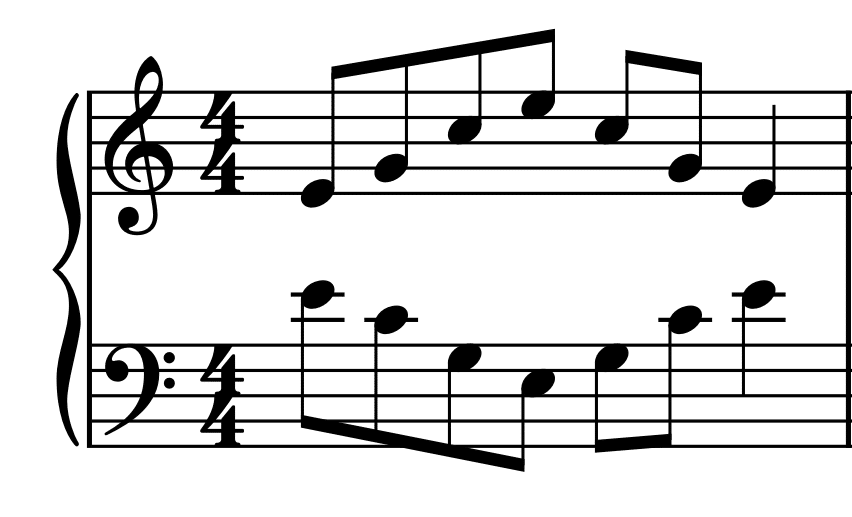
Now that we know how to play arpeggios in parallel motion, let’s play them in contrary motion.
This might seem like a brain teaser, but if you mentally highlight the notes of the chord on the piano keys, it will seem a lot easier. You’re playing the same chord in each hand; it’s just that your hands are playing different notes of the chord at the same time.
Try this in root position first.
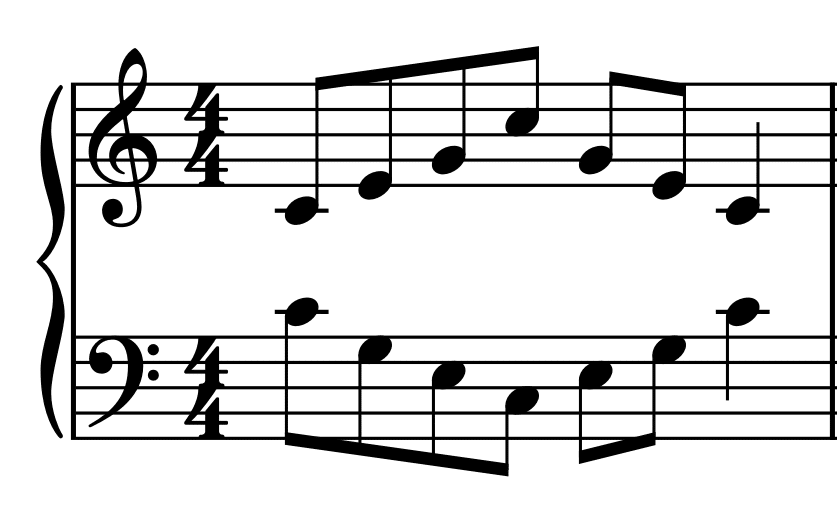
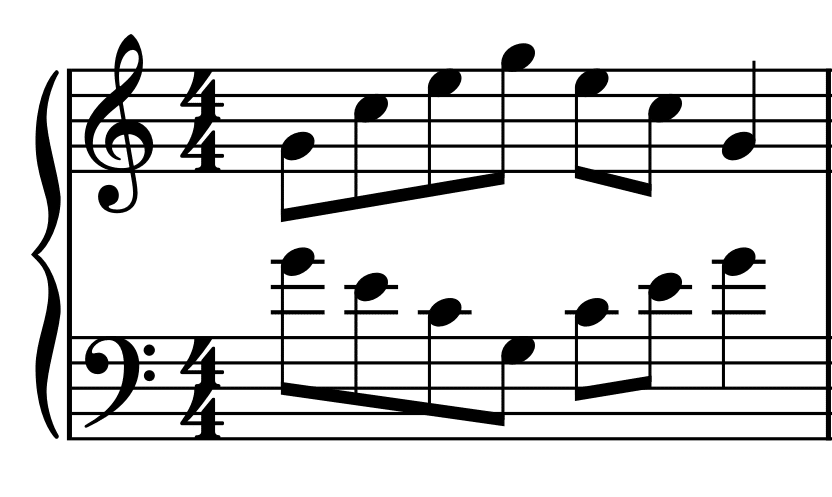
Now, try it in first inversion.
Don't forget to try it in second inversion, too!
Challenge #8
We’re on to the last hands together exercise: a series of fun rhythm challenges. We’re going to use the C major pentascale we talked about earlier to practice three rhythmic patterns. Although these might sound complicated, you’ll be surprised with how simple they are to play once you understand them.
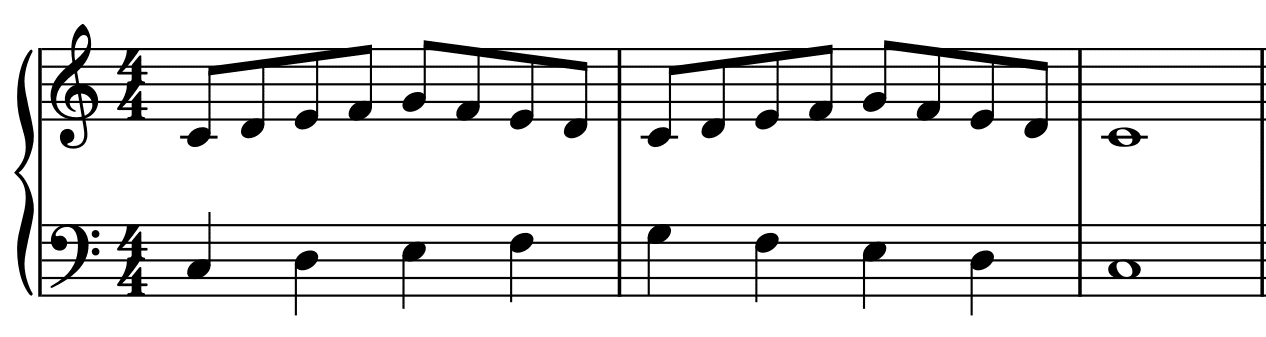
The first rhythm is 1 against 2. This means for every 1 note we play with one hand, we’ll play 2 notes in the other. Basically, this is playing quarter notes in one hand, and eighth notes in the other. Try this rhythm pattern by playing quarter notes in the right hand and the eighth notes in the left.
Try flipping this so you can play two notes in the right hand for every one note in the left.
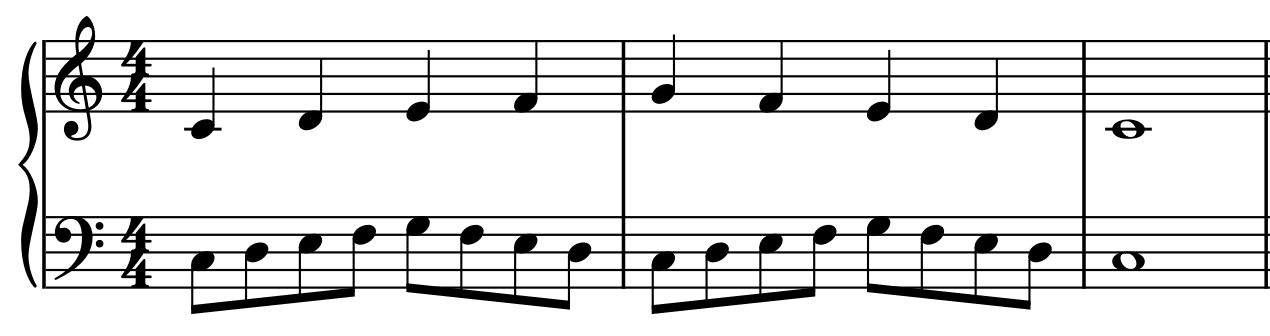
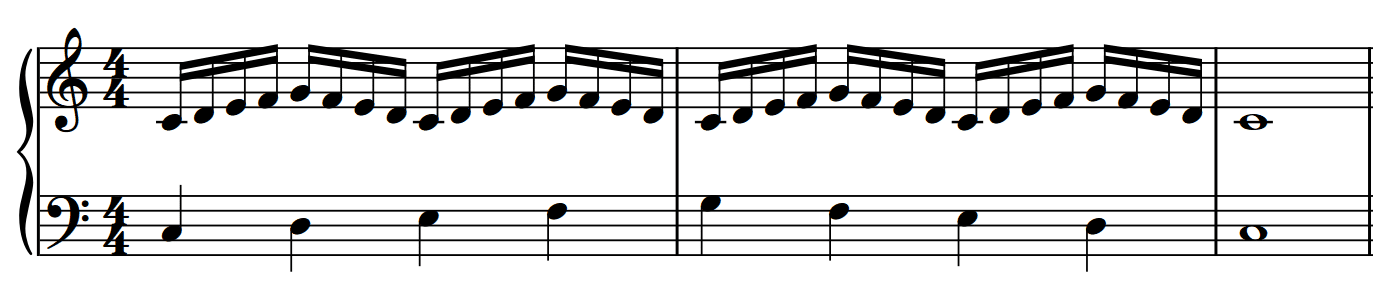
Next, let’s try 1 against 4. This is means for every 1 note we play with one hand, we’ll play 4 notes with the other. This means we’ll be playing quarter notes against sixteenth notes. Try it out by playing the quarter notes with the right and the sixteenth notes in the left.
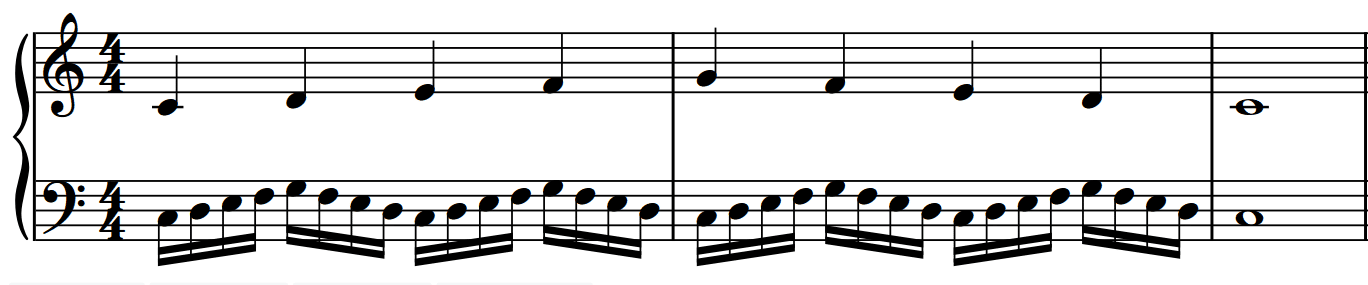
Let’s flip it so our right hand is playing the sixteenth notes, and the left hand is playing the quarter notes.
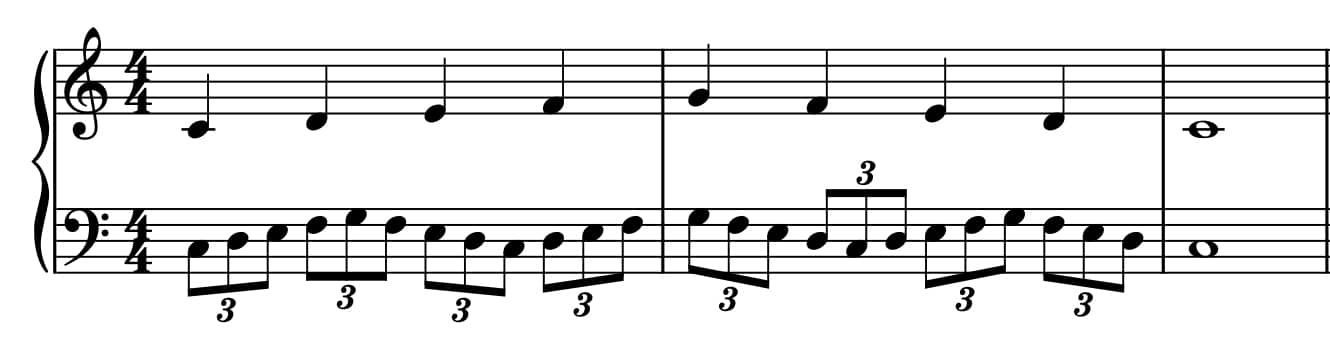
The last rhythm challenge is 1 against 3, and this means we’ll be playing three notes for every single note. These groups of three notes are called triplets, and you’ll see them a lot of music. Triplets are often indicated in sheet music with a 3 under or above the group of three notes.
Try this first with the triplets in the left hand, and the single notes in the right hand.
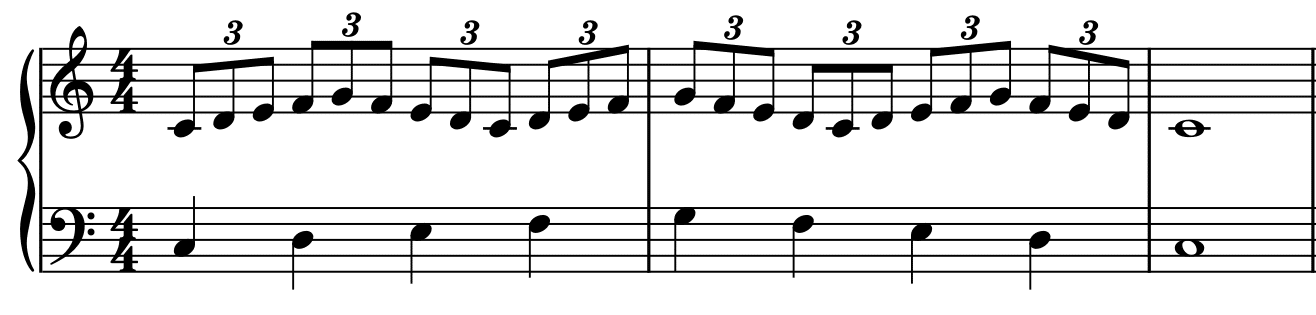
Now, reverse this so the triplets are in the right hand, and the single notes are in the left hand.
Bonus Hacks
Want to play piano with 2 hands faster? Implement each one of these 5 simple hacks, and you’ll see amazing results!
- It's mostly about training your brain to do two things at the same time. You already have the ability to play the piano hands separately, so what you need to work on is splitting your brain to process the left hand and the right hand parts.
- Be patient with yourself. Learning to play the piano hands together is really challenging, and it might take you a while to master it; so simply put in the work, and you’ll see success.
- Learn the parts of a piece hands separately at first. Put them together once you kno them well independently. This simplifies the notes and rhythms so you can learn them faster. As you become more advanced, you can wean yourself off of hands separate first.
- Avoid playing music that is too hard for you, especially if you’re brand new to piano. Choose pieces that are at your level or only slightly above, or you will quickly become frustrated with complicated rhythms, chords, fingering, and other difficulties.
- The most important thing to remember is to play slowly. Playing too fast doesn’t give your brain time to process all the new information, which will slow down the learning process and leave you frustrated. You always want to practice slow enough that you can play without hesitations or stumbles. Otherwise, you’re imprinting those mistakes in your muscle memory, which you’ll have to unlearn later.
Conclusion
Fantastic work on playing those challenging finger exercises! Now, you should be a lot better at playing the piano hands together.
If you found this video helpful, please hit the like button and share it with a friend. Don’t forget to subscribe and hit the bell for notifications so you don’t miss any exciting new videos. Happy piano playing!
Follow Emma Blair Piano on Pinterest, Instagram, Facebook, Twitter, and YouTube!
If you enjoyed this post or found it helpful, please leave a comment below. You'll make my day!
Video
Prefer to watch this content instead of read? Check out this visual demonstration of these exercises and tips in the video below!


Harvey Judd
what makes you think I can read music how would I know where C is at?
Emma
You can watch a demonstration and explanation of each of the exercises in this article, along with where middle C is, in my accompanying video here: https://www.youtube.com/watch?v=ZslnIXkoTBI